Chimneys are a beautiful and functional feature in many homes, serving as the heart of the property by providing a warm, cozy aesthetic. However, like any other structural element of your roof, a chimney requires proper maintenance to function efficiently over time. One key component of a well-maintained chimney is the chimney flashing. Despite its simple appearance, chimney flashing plays a crucial role in protecting your home from water damage and maintaining your property’s structural integrity.
Our expert guide will explore everything you need to know about chimney flashing, including:
- Its purpose
- Types
- Installation process
- Signs of damage
- Why regular maintenance is imperative for its longevity
What Is Chimney Flashing?

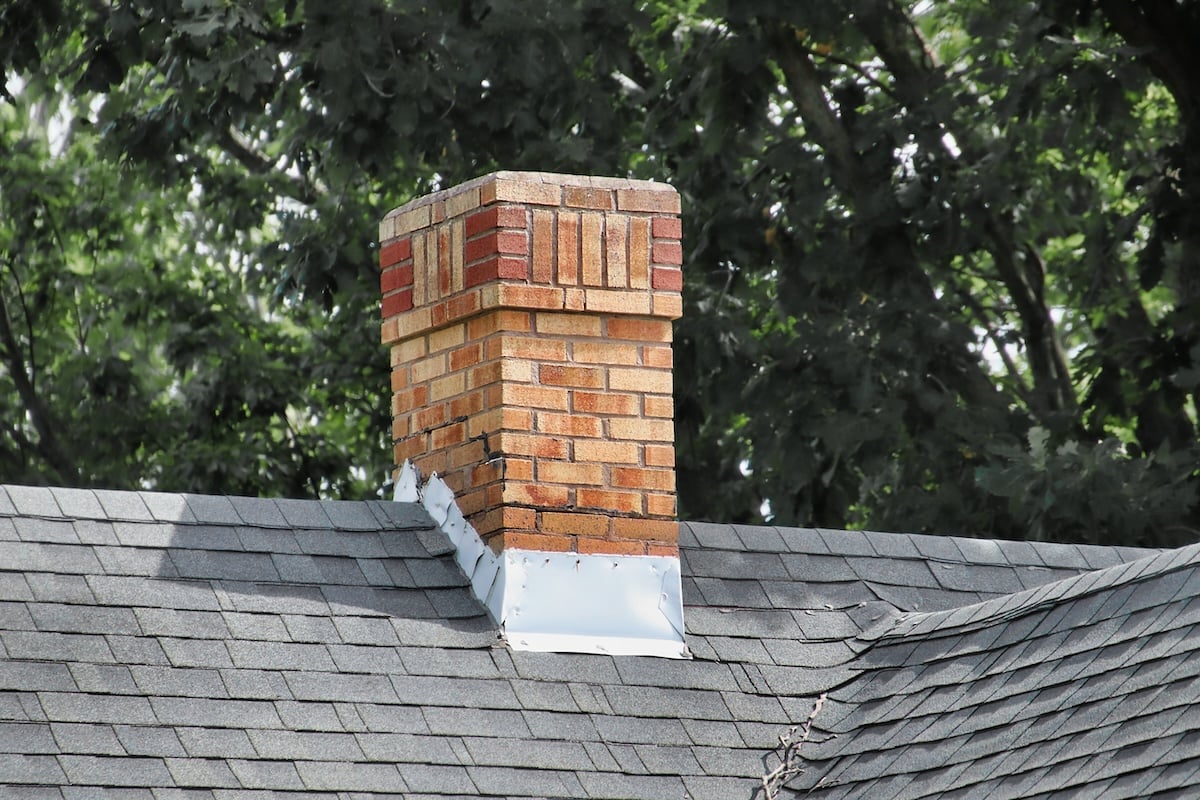
Chimney flashing is a weatherproof barrier installed around the base of a chimney where it meets the roof. Its primary purpose is to prevent water from seeping into the roof or chimney structure during rain or snow. Without flashing, water could penetrate these vulnerable areas, leading to significant damage such as mold, wood rot, weakened structural elements, and costly repairs.
Flashing typically consists of durable materials such as galvanized steel, aluminum, copper, or lead. These materials are designed to resist water and withstand various environmental conditions, ensuring the structure remains watertight for years to come.
Why Is Chimney Flashing Essential?
Roof-to-chimney intersections are highly prone to leaks due to their complex shapes and the natural tendency of water to pool in crevices. Chimney flashing acts as a seal to:
- Prevent Water Damage: It blocks water from infiltrating the roof’s surface and the interior walls of your home.
- Extend the Roof’s Lifespan: By preventing water from seeping in, flashing reduces wear and tear on roofing materials.
- Protect the Chimney Structure: Flashing ensures the masonry work of the chimney stays dry, minimizing the risk of cracks and erosion.
- Avoid Expensive Repairs: Water damage remediation can quickly add up, but proper flashing serves as a proactive measure against such costs.
Different Types of Chimney Flashing
Not all flashing is created equal. Depending on your roof design and budget, different types of flashing may be used. Below are some common types of chimney flashing:
Step Flashing
Step flashing is a series of L-shaped metal pieces installed in a staggered pattern, effectively guiding water away from the chimney. It’s often used for chimneys located on sloped roofs.
✅ Advantages:
- Provides excellent water resistance for sloped roofs.
- Highly durable and integrates seamlessly with roofing shingles.
Counter Flashing
Counter flashing is installed over the step flashing and embedded into the chimney masonry. It reinforces the waterproof barrier by adding another layer of protection.
✅ Advantages:
- Reduces the likelihood of water penetration.
- Works well in combination with other flashing types.
Continuous Flashing
Also known as apron flashing, this type protects the lower side of the chimney. It consists of a single piece of metal and is often used to direct water flow away from the base.
✅ Advantages:
- Simplifies installation for smaller chimneys.
- Provides an unobtrusive, seamless look.
Cricket Flashing
A cricket is a peaked structure installed on the higher side of the chimney that directs water and debris away from the intersection.
✅ Advantages:
- Ideal for chimneys located at the roof’s slope angles or larger chimneys.
- Prevents water and snow from pooling.
Base Flashing
Base flashing is a two-piece flashing system where one piece is attached at the roof’s surface, while the other extends up the chimney. The two sections allow for roof expansion and contraction without compromising waterproofing.
✅ Advantages:
- Effective for chimneys present on steeper roofs.
- Adapts to roof shifts without cracks or leaks.
6-Step Installation Process for Chimney Flashing

Proper installation of chimney flashing is critical for ensuring its effectiveness. Below, we’ve outlined the typical installation process step by step:
Step 1. Inspection and Preparation
- Inspect the chimney and roof for any damage before installation.
- Remove old flashing or debris from the installation area.
- Ensure the roofing shingles around the chimney are intact.
Step 2. Install Step Flashing
- Cut and install L-shaped pieces of metal against the roof and chimney.
- Position each piece under a layer of shingles and secure it to the roof.
Step 3. Add Counter Flashing
- Counter flashing is carefully embedded or mortared into the chimney masonry.
- It is folded down over the step flashing to create a watertight seal.
Step 4. Seal the Edges
- Apply a high-quality caulking or roofing sealant to edges, ensuring there are no gaps where water could enter.
Step 5. Install Cricket Flashing (if applicable)
- For chimneys on steeper roofs, install a ridged cricket design to divert water effectively.
Step 6. Final Inspection
- Perform a leak test by directing water onto the chimney base and observing for any seepage.
- Ensure all materials are securely fastened and sealed.
Installing chimney flashing requires expertise and precision. It’s advisable to entrust the job to licensed professionals, such as the team at McCormick Renovations, to ensure it’s done correctly.
Signs of Damaged Chimney Flashing
Damaged or deteriorated chimney flashing can lead to water infiltration and a host of other problems. Here are some signs that your flashing may need repairs or replacement:
- Rust or Corrosion on the flashing material.
- Cracks in the Sealant, exposing the area to water ingress.
- Water Stains or Leaks inside the home, especially on walls near the chimney.
- Warped or Missing Flashing pieces caused by wind or storm damage.
- Mold and Mildew Growth in your attic or around the chimney.
Causes of Chimney Flashing Damage
Several factors can contribute to flashing damage, such as:
- Weather Conditions: Extreme temperatures, wind, and hail can weaken materials.
- Improper Installation: Poorly installed flashing is prone to leaks and damage.
- Age: Flashing materials may degrade over time, necessitating replacement.
- Poor Maintenance: Neglecting regular inspections can exacerbate minor issues.
The Importance of Regular Maintenance
Like any other part of your roof, chimney flashing requires regular maintenance to stay in good condition. McCormick Renovations recommends scheduling periodic roof and chimney inspections to:
- Identify potential problems early.
- Re-seal worn-out sections.
- Remove debris that could interfere with flashing.
The Cost of Flashing Repairs or Replacement
The cost of chimney flashing repairs or replacement can vary based on factors like the chimney’s size, roof type, and materials used. On average:
- Simple repairs may range from $200 to $500.
- Complete replacement for more extensive damage could range from $1,000 to $2,500.
While repairing flashing may seem expensive upfront, it’s a small price to pay compared to the costs of repairing water damage, replacing insulation, or treating mold.
Your Local Roof Flashing Experts

Chimney flashing is an unsung hero that protects your home from water damage while extending the life of your roof. Proper installation, regular maintenance, and timely repairs are essential for keeping your flashing in top condition.
If you suspect your chimney flashing might be damaged or overdue for a replacement, don’t wait. Contact McCormick Renovations today for a professional inspection and trusted services tailored to your needs.