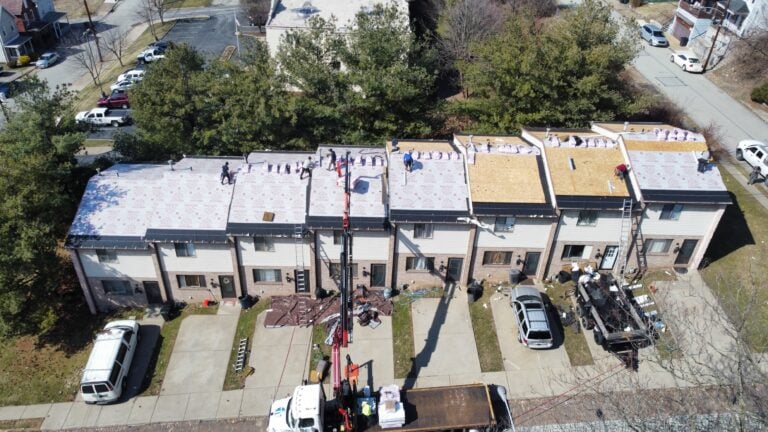
Roof valley flashing protects the most water-stressed area on any pitched roof, because valleys collect runoff from two intersecting roof planes and channel it down toward the eaves at significantly higher volume and velocity than the field of the shingles. Poorly installed valleys are one of the leading causes of roof leaks, and the right combination of flashing type, material, and installation technique determines whether a valley performs for 30 years or starts leaking after 5. This guide walks through the main types of valley flashing, the materials that work best in each application, and the installation details Pittsburgh-area homeowners should look for in any roof replacement quote.
- Three valley types: Open, closed-cut, and woven valleys explained with their strengths and weaknesses.
- Material breakdown: How copper, galvanized steel, aluminum, and pre-painted metals compare.
- Installation guidance: The underlayment, fastener placement, and detail work that separate quality installs from leaky ones.
What Is Roof Valley Flashing and Why Does It Matter?
Roof valley flashing is the protective layer installed beneath or alongside the shingles where two roof planes meet, designed to channel concentrated water flow down to the gutters without letting it penetrate the deck. Valleys handle more water than any other part of the roof, which is why valley details are statistically the highest-risk locations for leaks.
How Much Water Actually Flows Through a Roof Valley?
A roof valley collects runoff from both adjoining roof planes and concentrates it into a single channel, often handling several times the water volume of an equivalent square foot of field shingles. On a one-inch rainfall, a typical residential roof can shed thousands of gallons of water, and valleys carry a disproportionate share of that load. The velocity also increases as the slope steepens, which means high-pitched roofs put even more stress on valley flashing than low-slope roofs do. Homeowners in Pittsburgh and surrounding areas see the consequences during heavy storms when poorly flashed valleys back up under the shingles.
- Concentrated flow: Valleys handle runoff from two roof planes funneled into one channel.
- Higher velocity: Steeper pitches drive water through the valley faster.
- Storm stress: Heavy rain and wind-driven water test valley details first.
- Ice load: Freeze-thaw cycles in Pittsburgh and surrounding areas pressure-test valleys every winter.
Why Are Valleys the Most Common Roof Leak Location?
Valleys fail more often than any other roof detail because they combine high water volume, complex geometry, and multiple installation steps that all need to be correct. Industry analysis attributes the majority of residential roof leaks to flashing failures, with valleys consistently leading the list. Common failure modes include exposed nail heads in the wrong location, undersized flashing, incompatible metal-to-shingle interactions, and shortcuts during installation that leave gaps for wind-driven water to enter.
- Complex geometry: Two planes meeting at varying angles creates challenging detail work.
- Multiple layers: Underlayment, ice and water shield, metal flashing, and shingles all need correct installation.
- Fastener placement: Nails in the wrong location create instant leak paths.
- Material compatibility: Some metal flashings react with asphalt shingles over time.
3 Main Types of Roof Valley Flashing
Each of the three valley types below has specific applications, strengths, and limitations, and the right choice depends on the shingle type, roof slope, climate, and homeowner preference. Read through each with your roof in mind, and confirm the planned valley type matches the shingle manufacturer’s installation requirements.
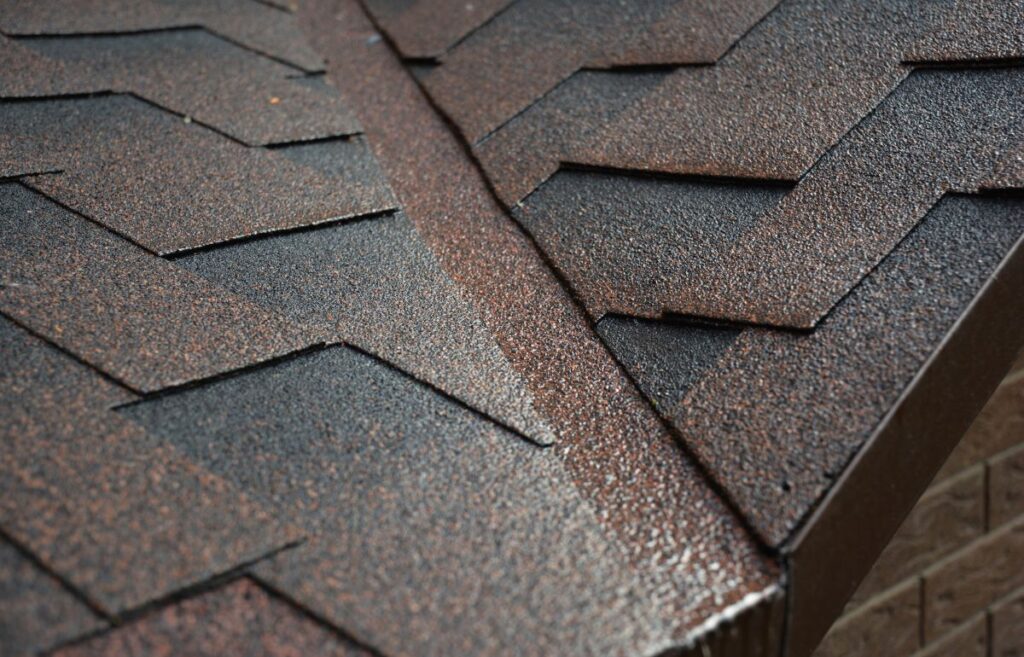
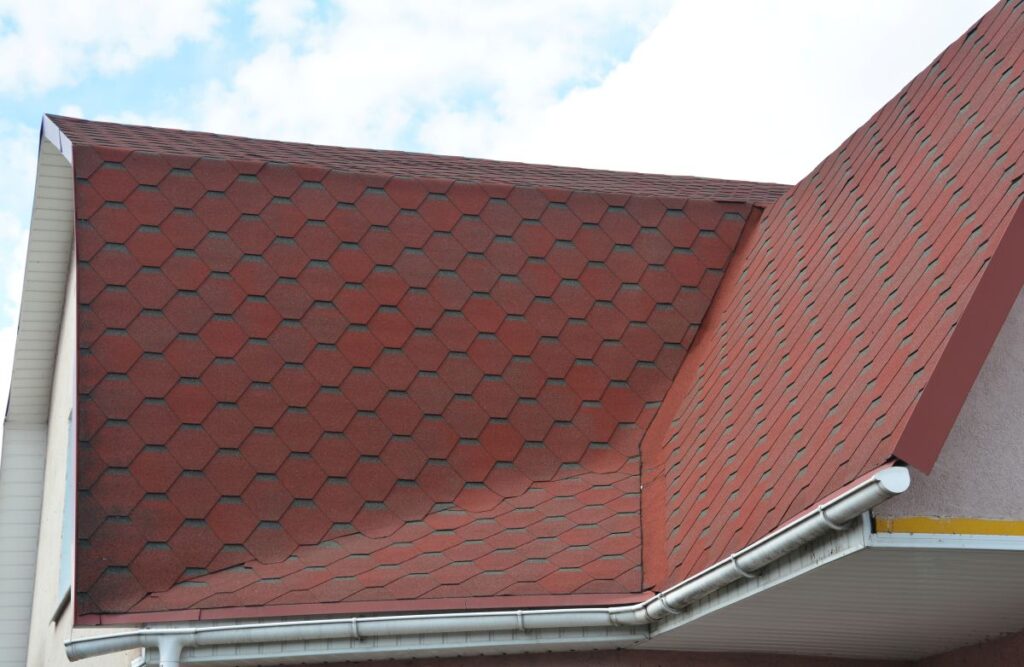
1. Open Valley with Visible Metal Flashing
An open valley uses a wide strip of metal flashing centered in the valley, with shingles trimmed back 3 to 6 inches from the centerline on each side to leave the metal exposed. The visible metal creates a clean, durable water channel that handles the highest water volumes and resists clogging from leaves and debris. Open valleys are the strongest option for high-rainfall climates, snow country, and any roof with a steep slope or large catchment area. According to GAF Technical Bulletin TAB-R-136, open and closed-cut valleys can be used by all shingle types, while laminated shingles like Timberline series require open or closed-cut valleys rather than woven.
- Best applications: High-rainfall regions, snow country, steep slopes, and laminated shingle roofs.
- Metal width: Typically 18 to 24 inches wide centered in the valley.
- Shingle setback: 3 to 6 inches from centerline on each side.
- Material choice: Aluminum, galvanized steel, copper, or pre-painted metal.
2. Closed-Cut Valley with Hidden Metal
A closed-cut valley installs metal flashing as a base layer, then runs shingles from one roof plane all the way across the valley, with shingles from the other plane trimmed cleanly along the valley centerline. The resulting line is visually clean and the metal flashing remains hidden, which makes closed-cut a popular choice for visible front-facing valleys on architectural shingle roofs. Performance is strong when installed correctly, although the hidden metal makes inspection and repair more difficult than open valleys allow. Closed-cut is suitable for all standard shingle types.
- Best applications: Architectural shingle roofs with moderate water loads.
- Visual appearance: Clean cut line with no exposed metal.
- Underlayment requirement: Ice and water shield extending 36 inches each side of the centerline.
- Inspection limitation: Hidden metal cannot be visually verified after installation.
3. Woven Valley Without Visible Metal Flashing
A woven valley alternates shingles from each roof plane across the valley, weaving them together over the underlayment with no exposed metal flashing. The technique works only with three-tab strip shingles because laminated shingles are too thick and rigid to weave cleanly without cracking. Woven valleys are increasingly rare on modern roofs because most homeowners choose architectural laminated shingles, and the woven method is more prone to leaks in heavy rain and ice buildup. GAF and most major manufacturers specifically prohibit weaving on laminated shingle lines.
- Best applications: Three-tab strip shingle roofs only.
- Slope requirement: Minimum 4:12 pitch for water shedding.
- Failure risk: Higher than open or closed-cut in heavy rain and ice conditions.
- Manufacturer rule: Laminated shingles (Timberline, Landmark, Duration) cannot use woven valleys.
What Materials Are Used for Valley Flashing?
Valley flashing material directly affects lifespan, appearance, and cost, with several common options available. Homeowners in Pittsburgh and surrounding areas should weigh both the material and the gauge before approving a quote.
How Do the Main Flashing Materials Compare?
The four most common valley flashing materials are aluminum, galvanized steel, copper, and pre-painted metal, each with different lifespan, cost, and appearance profiles. Aluminum is the most common residential choice because it balances cost and corrosion resistance, while copper delivers premium longevity at higher cost. Galvanized steel is an economical option that works well in dry climates but corrodes faster in wet, salt-exposed, or industrial environments. Pre-painted metals combine corrosion resistance with color-matched aesthetics.
- Aluminum: $1.50 to $3 per linear foot installed; 30 to 40 year lifespan.
- Galvanized steel: $1.25 to $2.50 per linear foot installed; 20 to 30 year lifespan.
- Copper: $6 to $15 per linear foot installed; 50 to 100-plus year lifespan.
- Pre-painted metal: $2 to $5 per linear foot installed; 30 to 40 year lifespan.
What Gauge or Thickness Should Valley Flashing Be?
Gauge matters because thin flashing dents under hail and foot traffic, while heavy gauge holds its shape and resists damage over decades. Industry standards call for minimum 26 gauge for galvanized steel valleys (about 0.018 inches thick) and 16 ounces per square foot for copper valleys (about 0.0216 inches thick). Aluminum valley flashing is typically 0.019 to 0.032 inches thick, with thicker gauges recommended for steep slopes and snowy climates. Pittsburgh and surrounding areas homeowners should specify thicker gauges to handle freeze-thaw cycles and occasional hail events.
- Galvanized steel: Minimum 26 gauge (0.018 inches).
- Aluminum: Minimum 0.019 inches, with 0.032 inches preferred for steep slopes.
- Copper: Minimum 16 ounces per square foot for residential, 20 ounces for slate or tile.
- Pre-painted metal: Similar gauge specs to base material with factory finish added.
How Should Valley Flashing Be Installed?
Valley flashing installation is one of the most installation-sensitive details on any roof, with multiple steps that each need to be correct for the valley to perform. Read through the steps below to understand what to look for in a quality install.
What Underlayment and Ice Barrier Should Be Used?
Quality valley installations start with full-coverage ice and water shield extending 36 inches on each side of the valley centerline, applied directly to the deck before any metal flashing or shingles go on. The self-adhered membrane creates a backup waterproof layer that protects the deck even if water gets past the metal flashing or shingles above. In Pittsburgh and surrounding areas, ice and water shield is required by code along eaves and is strongly recommended in every valley. Synthetic underlayment then covers the rest of the deck.
- Ice and water shield coverage: 36 inches on each side of the valley centerline.
- Direct deck application: Self-adhered membrane bonded to the sheathing.
- Synthetic underlayment: Covers the remaining deck area.
- Code requirement: Ice barrier mandated along eaves in IECC Climate Zone 5.
Where Should Fasteners Be Placed in a Valley?
Fastener placement is one of the most critical details in valley flashing, because a single nail in the wrong location creates a direct leak path. Industry standards from the National Roofing Contractors Association require that no fasteners be placed within 6 inches of the valley centerline on either side, with all fasteners hidden under the next course of shingles. Proper installation uses cleats or clips along the edges of the metal flashing rather than nails through the field. Pittsburgh and surrounding areas contractors should follow this requirement consistently regardless of shingle brand.
- Fastener-free zone: No nails within 6 inches of the valley centerline.
- Cleat or clip attachment: Holds metal flashing in place without penetrating the field.
- Hidden fasteners: All nails covered by the next shingle course.
- Sealant use: Plastic roofing cement applied at the cut edges of shingles in closed-cut valleys.
Frequently Asked Questions
How Long Does Valley Flashing Last?
Lifespan depends on material: aluminum lasts 30 to 40 years, galvanized steel lasts 20 to 30 years, copper lasts 50 to 100-plus years, and pre-painted metal lasts 30 to 40 years. Proper installation and regular cleaning of debris from valleys directly affect how close any material reaches its maximum lifespan.
Can Valley Flashing Be Replaced Without a Full Re-Roof?
In some cases yes, particularly when the surrounding shingles are still in good condition. Replacement requires carefully lifting and removing the adjacent shingles, removing and replacing the underlayment and flashing, and then reinstalling or replacing the shingles. Most contractors recommend valley repair during a planned re-roof for cost efficiency.
What Causes Valley Flashing to Fail?
Common causes include exposed nails within 6 inches of the centerline, undersized flashing, corrosion from incompatible metals, debris buildup that traps water, and woven valley installations on laminated shingles. Proper installation and annual debris removal prevent most valley failures.
Should I Choose Open or Closed-Cut Valley Flashing?
The choice depends on water volume, climate, and aesthetic preference. Open valleys handle higher water volumes and are easier to inspect and maintain, while closed-cut valleys deliver a cleaner appearance with strong performance in moderate conditions.
How Often Should Roof Valleys Be Inspected?
Inspect roof valleys at least twice per year and after major storms, looking for debris buildup, lifted shingles, exposed nails, corrosion on metal flashing, and any visible gaps. Clear leaves and twigs immediately so water flows freely.
Do I Need a Licensed Contractor for Valley Flashing Repair?
Pennsylvania requires home improvement contractors performing work over $500 to be registered with the state Attorney General’s office. Hiring a registered, insured contractor protects manufacturer warranties and ensures the valley meets code and shingle manufacturer requirements.
Why McCormick Renovations Is the Right Partner for Your Valley Flashing Work
McCormick Renovations brings hands-on experience, deep system knowledge, and a commitment to clean, code-compliant workmanship to every valley we install in Pittsburgh and surrounding areas. We follow manufacturer requirements on shingle-to-valley combinations, use ice and water shield across the full valley width, place fasteners outside the 6-inch protection zone, and select the right metal gauge and material for your home’s pitch and climate exposure. If your roof has aging valleys, recurring leaks, or any of the warning signs covered above, reach out to McCormick Renovations today for a free estimate. Our team will inspect every valley, explain the tradeoffs, and design a roofing system that protects your home for decades.